Airworthiness Alert-Cessna 177 and 210
Now Offering Cessna 177 and 210 Eddy Current Wing Carry Thru Spar Inspection In reference to the Mandatory SEL Airworthiness Alert. Please Contact us if you want to discuss or Schedule a Inspection.
More InfoPA28 & PA32 Piper AD 2020-26-16
Now Offering Piper PA 28 & PA32 Eddy Current Spar Inspection In reference to the AD 2020-26-16. Please Contact us if you want to discuss or Schedule a Inspection.
More Info
Ultrasonic Class NOW!
Class Dates are Level One Training Sept 17th-21st & Level Two Training Nov 14th-18th. Contact for more Information
More InfoKing Air 2020-25-01 AD
New King Air AD - In Effect January 11th! Please Contact us if you want to discuss or Schedule a Inspection.
More InfoASI Nondestructive Testing Services
Nondestructive testing (NDT) is a wide group of analysis techniques used in science and industry to evaluate the properties of a material, component or system without causing damage. The terms Nondestructive examination (NDE), Nondestructive inspection (NDI), and Nondestructive evaluation (NDE) are also commonly used to describe this technology. Because NDT does not permanently alter the article being inspected, it is a highly-valuable technique that can save both money and time in product evaluation, troubleshooting, and research. Common NDT methods in aviation and aerospace that Aircraft Structural Inspections provides include Penetrant, Magnetic Particle, Eddy Current, Ultra Sonic, and X-Ray.
Pentrant Testing PT or Dye Penetrant inspection (DPI), also called Liquid Penetrant Inspection (LPI) is a widely applied and low-cost inspection method used to locate surface-breaking defects in materials (metals, plastics, or ceramics). The penetrant may be applied to all non-ferrous materials and ferrous materials LPI is used to detect casting, forging and welding surface defects such as hairline cracks, surface poroisty leaks in new products, and fatigue cracks on in-service components.
Magnetic Particle Testing MT is where small magnetic particles in the form of a powder or liquid are sprayed on the magnetized ferrous metal test object and gather at surface-breaking cracks. AC/DC is used depending on the type of defect one is trying to find as well as the amount current. This method can be used to find surface and subsurface defects and is also a less expensive inspection method that can used in the field.
Eddy Current Testing uses electromagnetic induction to detect flaws in conductive materials. There are several limitations, among them: only conductive materials can be tested, the surface of the material must be accessible, the finish of the material may cause bad readings, the depth of penetration into the material is limited by the materials' conductivity, and flaws that lie parallel to the probe may be undetectable.
Eddy-current testing can detect very small cracks in or near the surface of the material, the surfaces need minimal preparation, and physically complex geometries can be investigated. It is also useful for making electrical conductivity and coating thickness measurements. The testing devices are portable and provide immediate feedback.
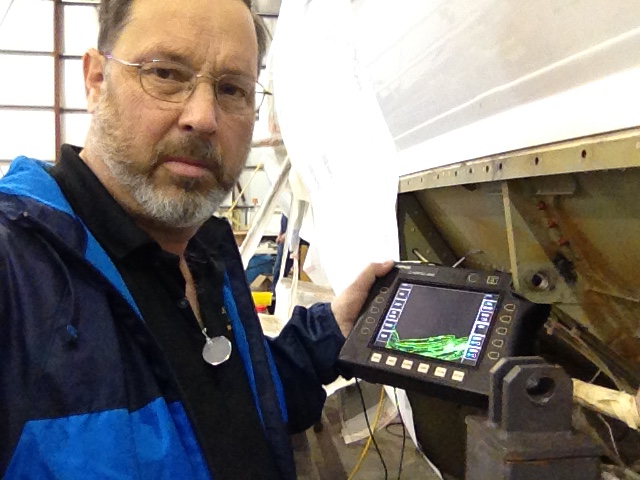
Ultrasonic testing (UT) is very short ultrasonic pulse-waves with center frequencies ranging from 0.1-15 MHz and occasionally up to 50 MHz are launched into materials to detect internal flaws or to characterize materials. The technique is also commonly used to determine the thickness of the test object, for example, to monitor pipework corrosion.
Ultrasonic testing is often performed on steel and other metals and alloys, though it can also be used on concrete, wood and composites, albeit with less resolution. It is a form of non-destructive testing used in many industries including aerospace, automotive and other transportation sectors.
In ultrasonic testing, an ultrasound transducer connected to a diagnostic machine is passed over the object being inspected. The transducer is typically separated from the test object by a couplant (such as oil) or by water, as in immersion testing.
There are two methods of receiving the ultrasound waveform, reflection and attenuation. In reflection (or pulse-echo) mode, the transducer performs both the sending and the receiving of the pulsed waves as the "sound" is reflected back to the device. Reflected ultrasound comes from an interface, such as the back wall of the object or from an imperfection within the object. The diagnostic machine displays these results in the form of a signal with an amplitude representing the intensity of the reflection and the distance, representing the arrival time of the reflection. In attenuation (or through-transmission) mode, a transmitter sends ultrasound through one surface, and a separate receiver detects the amount that has reached it on another surface after traveling through the medium. Imperfections or other conditions in the space between the transmitter and receiver reduce the amount of sound transmitted, thus revealing their presence. Using the couplant increases the efficiency of the process by reducing the losses in the ultrasonic wave energy due to separation between the surfaces.
Radiographic Testing (RT) is method of inspecting materials for hidden flaws by using the ability of short wavelength electromagnetic radiation to penetrate various materials.
